Office Chair Setup for Sciatica: The 6-Point Protocol
Office chair setup for sciatica fails when it’s just generic ergonomics applied to a person with nerve pain.
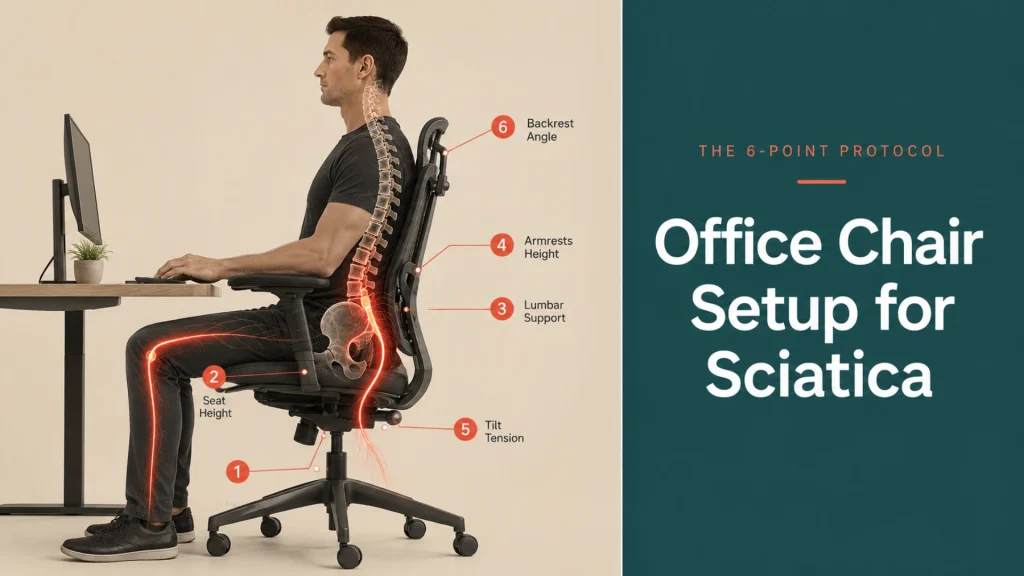
Calibrate six adjustments in the order that controls sciatic nerve pressure first: seat height, seat depth, lumbar support, armrests, tilt tension, and backrest angle. Each one maps to a specific anatomical pressure point. Get the sequence right and you remove the chronic stressor, not just the symptom.
This guide walks through each adjustment, what it does to the sciatic nerve, and where most setups go wrong.
Key Takeaways
- The Sciatica Adjustment Sequence is the standard 6-Point Chair Calibration reordered around sciatic nerve geometry, with seat-pan adjustments doing most of the relief work.
- Posterior pelvic tilt is the single biggest seated trigger for sciatic compression. Two adjustments (seat height and seat depth) correct it.
- Piriformis syndrome accounts for an estimated 5 to 8 percent of low back pain cases and is aggravated by prolonged sitting.
- A chair without seat depth adjustment can’t deliver sciatica relief, regardless of how good its lumbar support is.
- As of 2026, target benchmarks for office chair setup for sciatica are: backrest angle 100 to 110 degrees, seat depth gap 2 to 3 fingers behind knees, lumbar pad at belt line.
Why Generic Chair Advice Doesn’t Work for Sciatic Nerve Pain
Most “sit with sciatica” guides give the same five tips. Sit up straight. Feet flat. Lumbar pillow. Take breaks. Avoid crossing your legs.
None of that’s wrong. But none of it’s calibrated to where sciatic pressure actually lives.
Sciatica is rarely caused by sitting, but the wrong sitting position keeps it from healing.
Our standard 6-point chair calibration works for general comfort and posture. Sciatica needs the same six adjustments, but in a different priority order, and with a different rationale for each.
The biomechanical case for that priority shift starts at the pelvis and the ischial tuberosities, not the lumbar pad.
Can sitting in an office chair cause sciatica?
Sitting rarely causes sciatica from a standing start. It does prolong, trigger, and worsen an existing predisposition. According to a 2024 narrative review of piriformis syndrome, the condition accounts for an estimated 5 to 8 percent of low back pain cases and is exacerbated specifically by buttock and hip-position loads, like the ones a chair imposes.
What does sciatica actually do when you sit down?
The sciatic nerve runs from your lumbosacral junction, under or sometimes through the piriformis muscle, down the back of your thigh. Sitting compresses three points: the nerve roots at L4-S3, the piriformis where the nerve exits the pelvis, and the soft tissue under your ischial tuberosities (the sit bones).
Each of those points has a corresponding chair adjustment.
Why posture advice misses the sciatic nerve
Posture advice fixes the spine. Sciatica needs the pelvis fixed first.
If your pelvis tilts backward (posterior pelvic tilt) when you sit, three things happen at once. Your lumbar curve flattens. Your sacrum loads the lumbosacral junction. And your weight shifts onto the soft tissue posterior to your sit bones, which is exactly where the sciatic nerve passes.
Your sit bones, not your lower back, decide whether the chair helps or hurts your sciatic nerve.
So the protocol starts at the seat pan, not the lumbar pad.
The Sciatica Adjustment Sequence: Six Calibrations Mapped to Nerve Geometry
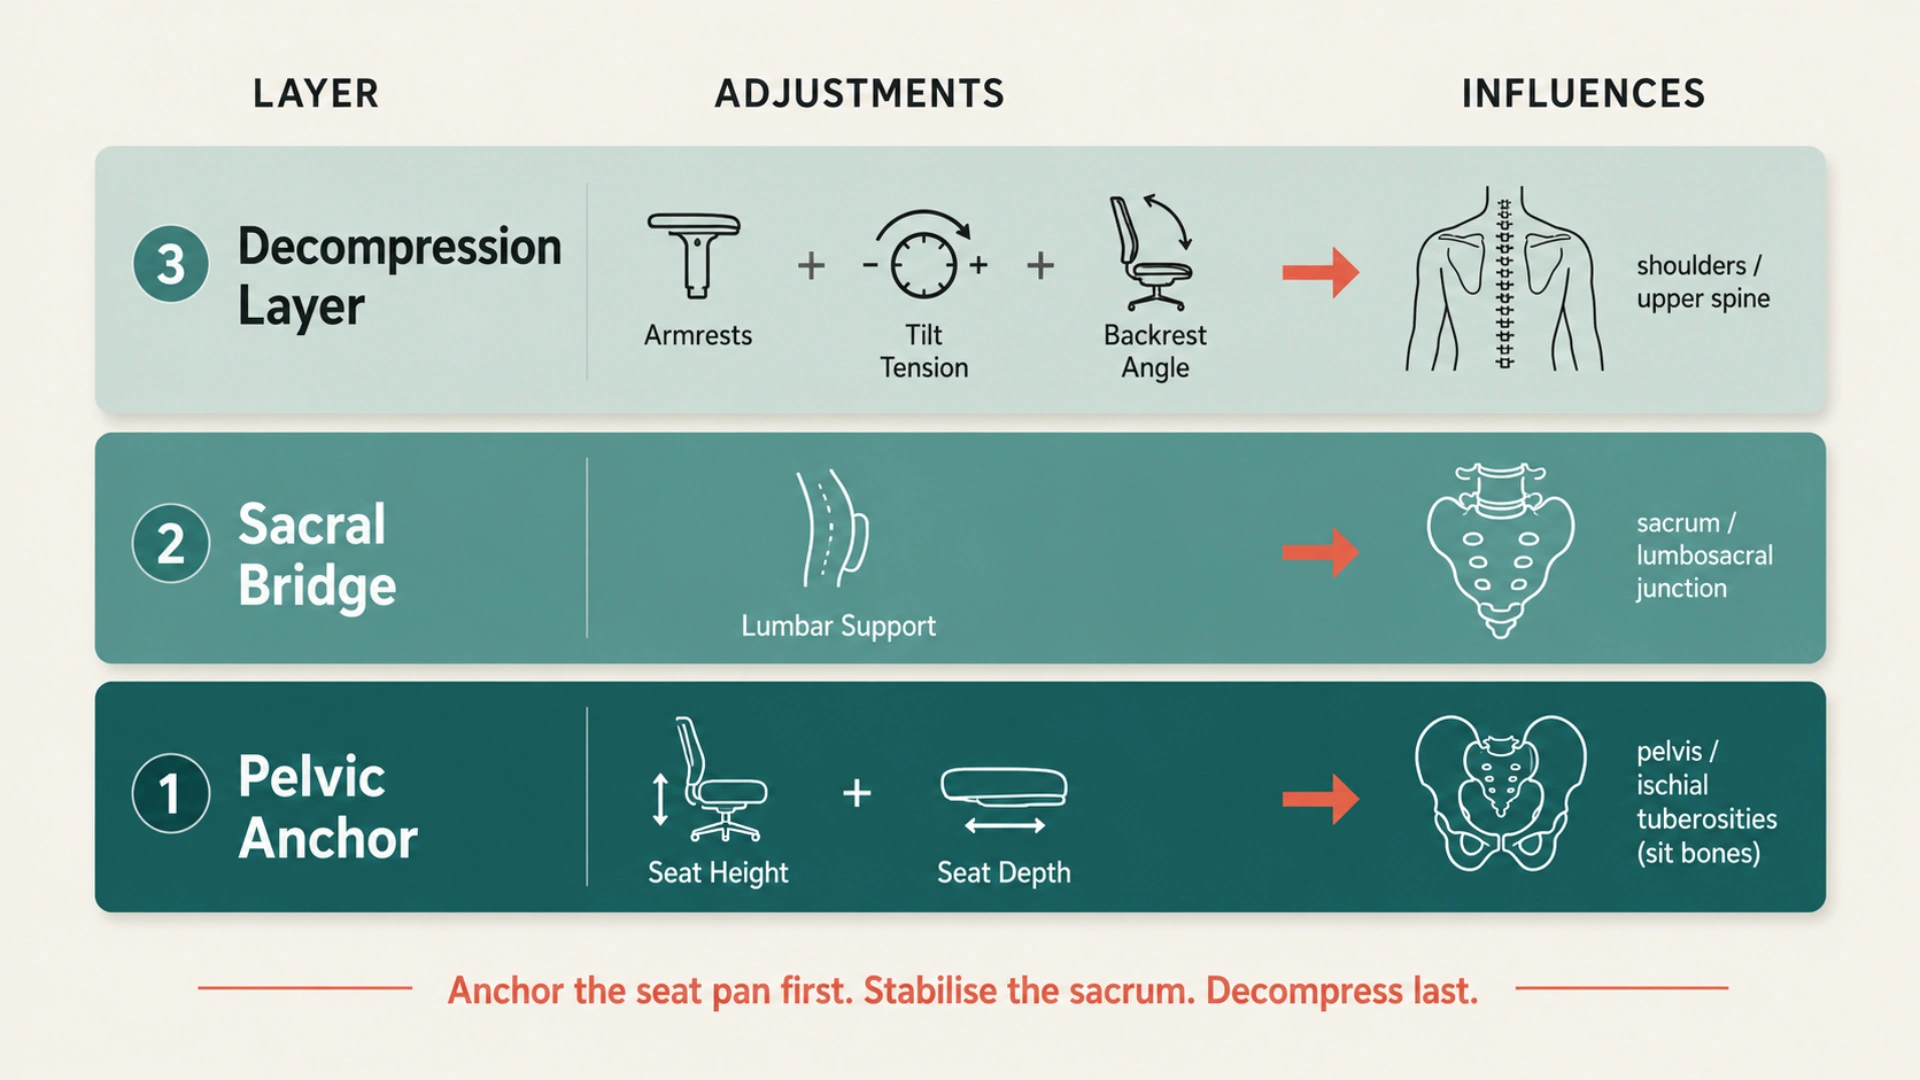
The Sciatica Adjustment Sequence reorders the six standard chair calibrations into three layers, each one addressing a different segment of sciatic nerve geometry.
Layer 1, Pelvic Anchor: seat height, seat depth. Controls pelvic tilt and ischial pressure.
Layer 2, Sacral Bridge: lumbar support. Maintains the sacral angle that keeps the lumbosacral junction decompressed.
Layer 3, Decompression Layer: armrests, tilt tension, backrest angle. Removes secondary load paths from shoulders and upper spine that pull the pelvis out of position.
How is this different from a standard chair setup?
In a general 6-point calibration, every adjustment matters roughly equally. For sciatica, the first two adjustments do most of the relief work. The rest stabilise the geometry the first two establish.
That priority shift matters when you’re choosing a chair. The Merryfair Reya is built for disc-related and sciatic-radiating pain because its seat pan replaces foam with 62 coil springs, which distribute ischial pressure dynamically as you shift. A chair that scores well on lumbar but skips seat-pan engineering will fail sciatica testing by hour three.
Seat Height: Where Pelvic Tilt Starts
Seat height isn’t about feet flat alone. For sciatica, it’s about whether your hips sit at, slightly above, or below your knees.
If your hips drop below your knee level, your pelvis tilts backward. That’s the posterior tilt that loads the lumbosacral junction and tightens the piriformis at the same time.
How high should my office chair be if I have sciatica?
Target a position where your hips sit 1 to 2 centimetres above your knees, not level or below. Feet stay flat on the floor.
Run these checks:
- Stand in front of the chair. The seat’s highest point should sit at or just above the bottom of your kneecap.
- Sit down. Hips should feel slightly higher than knees.
- Check your thighs. They should angle gently downward toward the knees, not be parallel.
- Confirm feet remain flat. If they dangle, you need a footrest, not a lower chair.
Most general guides recommend hips level with knees. For sciatica, that’s already too low. The 1-to-2-centimetre lift opens the hip-knee angle slightly, which reduces piriformis tension and keeps the pelvis from rotating backward.
Posterior pelvic tilt loads the lumbosacral junction and tightens the piriformis at the same time. Two failures, one chair adjustment.
Seat Depth: The One Adjustment That Decides Most Sciatica Outcomes
Seat depth is the single most important adjustment in office chair setup for sciatica. And it’s the one most chairs can’t make.
Why seat depth matters more than lumbar for sciatic pressure
Sciatic radiation patterns most commonly trace to one mechanical failure: the seat is too deep, and the pelvis can’t anchor against the backrest. Without that anchor, you slide forward. Once you slide forward, your lumbar contact disappears, your pelvis rotates backward, and your weight transfers from the centre of the sit bones to the soft tissue behind them.
That soft tissue is where the sciatic nerve runs.
Sit back fully against the backrest. Now check the gap between the seat’s front edge and the back of your knees. It should hold 2 to 3 finger widths.
A neutral pelvic position requires that gap. Without it, you scoot forward to relieve circulation pressure on your calves, and the whole sequence collapses.
How do I check if my seat depth is wrong?
Run this diagnostic. If any item lists true, your seat depth is fighting your sciatica:
- Your calves press against the seat edge when you sit fully back.
- You catch yourself sitting forward in the chair within 20 minutes of starting work.
- Your lumbar pad sits in empty space behind your lower back.
- The back of your thighs goes numb after 30 minutes.
- You need a cushion to “fill” the gap your back makes with the backrest.
Each of those is the same problem. The seat pan is too deep for your femur length, and your pelvis can’t anchor.
A chair that lacks seat depth adjustment can’t relieve sciatica. Lumbar support arrives too late to fix what the seat pan got wrong.
If your chair has a seat depth slider, pull it forward until the 2-to-3-finger gap appears. If it doesn’t have one, the chair is missing the adjustment sciatica needs most. (More on that in the escalation section.)
Lumbar Support: Bridging the Sacrum to the Backrest
Once the pelvis is anchored, lumbar support has a different job than most people think. It isn’t filling a curve for comfort. It’s stabilising the sacral angle so the lumbosacral junction stays decompressed.
Sacral angle: the angle between the top of the sacrum and the horizontal plane. In a neutral pelvis, it sits between 30 and 40 degrees. Drop below 30 and the lumbar curve flattens. Sciatic compression follows.
Where exactly should the lumbar pad sit?
The lumbar pad belongs at the small of your back, aligned with your belt line. Not your mid-back. Not your shoulder blades.
For sciatica, depth matters more than height. A pad too shallow leaves a gap; the sacrum unloads forward, and the angle collapses. A pad too aggressive pushes you out of the seat, undoing the pelvic anchor you just established.
Static cushions almost always fail this step because they don’t track your sacrum when you recline. Built-in lumbar support that tracks your spine through recline maintains the sacral angle whether you’re upright at typing or reclined at reading.
A 2023 finite-element study published in the Journal of Functional Morphology and Kinesiology found that maintaining lumbar lordosis during sitting reduces intradiscal pressure across all tested positions. For someone with sciatica, less disc pressure means less load on the nerve roots that feed the sciatic nerve.
So the lumbar pad isn’t doing comfort work. It’s doing decompression work.
Armrests, Tilt Tension, and Backrest Angle: The Decompression Layer
The final three adjustments don’t touch the sciatic nerve directly. They keep the first three adjustments from collapsing during a full work day.
How should I set armrests with sciatica?
Set armrest height so your forearms rest naturally with elbows at 90 to 100 degrees, shoulders neither lifted nor sagging. Without that arm support, the weight of your arms (about 5 percent of body weight per side) pulls down through your shoulders, into your upper spine, and eventually tilts your pelvis to compensate.
That pelvic compensation undoes everything Layers 1 and 2 set.
If your armrests block you from pulling close to the desk, lower them or pivot them outward. Reaching forward with unsupported arms is worse than no armrests.
What backrest angle relieves sciatic pressure?
A slight recline between 100 and 110 degrees reduces lumbar disc load compared to sitting at 90 degrees, according to a 2022 systematic review and meta-analysis of intradiscal pressure. For sciatica, that translates to less nerve-root compression.
But the “right” angle changes through your day.
| Activity | Backrest angle | Why |
|---|---|---|
| Focused typing | 100-105 degrees | Keeps pelvis anchored, minimal disc load |
| Reading, calls | 105-110 degrees | Lower disc pressure, easier piriformis |
| Decompression breaks | 110 degrees plus | Off-loads ischial pressure entirely |
The right backrest angle for sciatica is the angle you keep changing.
This is why tilt tension and a working synchro-tilt mechanism matter. They let you shift between angles without re-calibrating the rest of the chair every time. (See the breakdown of how the synchro-tilt mechanism coordinates seat and back for the engineering detail.)
Set tilt tension so the backrest moves under gentle pressure but doesn’t tip when you lean forward. Lock it for focused work. Unlock for movement.
Should I recline my office chair if I have sciatica?
Yes, in small doses through the day. A slight recline (100 to 110 degrees) lowers lumbar disc pressure, which reduces nerve-root irritation. Don’t lock yourself in a deep recline for hours; that just trades one static position for another. The point is movement between angles, not finding one perfect angle.
When the Chair Isn’t the Variable
Run the protocol for two to three weeks of consistent daily use. That’s the window where most sciatica chair calibrations show measurable change.
If pain hasn’t responded after three weeks of correct setup, the chair likely isn’t your remaining variable.
The chair removes the chronic stressor. Treatment removes the damage. They aren’t the same job.
Beyond sciatica, the physical benefits of ergonomic sitting extend to circulation, disc health, and cognitive load.
How long should I run the protocol before seeing a clinician?
Two to three weeks if you’ve ruled out red flags (loss of bowel or bladder control, progressive weakness, numbness in the saddle area). Any of those mean see a clinician now, not in three weeks. For mechanical sciatic discomfort that worsens specifically with sitting, three weeks of calibrated chair use tells you whether the chair is your main variable or a contributing one.
What if my chair can’t make these adjustments?
You’ll hit a ceiling that technique can’t break through. The two most common chair failures for sciatica:
- No seat depth slider. You can’t anchor the pelvis without it, no matter how good the lumbar pad is.
- Fixed seat pan with high-density foam alone. Static padding loads the ischial tuberosities the same way for hours. Dynamic seat surfaces (coil springs, suspension mesh, segmented cushions) redistribute load as you shift.
At that point, a chair upgrade is the variable. Browse Merryfair’s full range and check seat-pan engineering before backrest specifications. For sciatica, what’s under you matters more than what’s behind you.
This content is for informational purposes only. If you have diagnosed sciatica, a disc condition, or symptoms that worsen progressively, consult a qualified physiotherapist or spine specialist. A chair calibration alone may not resolve clinical sciatica and is not a substitute for medical treatment.
Calibration That Removes the Chronic Stressor
Office chair setup for sciatica is geometric, not generic.
Sciatica doesn’t respond to “sit up straight.” It responds to a pelvis that stops tilting backward, an ischial surface that stops loading the wrong tissue, and a sacrum that holds its angle through eight hours.
That’s six adjustments doing three jobs. Anchor, bridge, decompress.
The chair handles the chronic stressor. Treatment handles the damage. Run the calibration. Give it three weeks. If your chair makes every adjustment in the sequence and the pain hasn’t moved, the variable is somewhere else.
If your current chair can’t make these adjustments, the technique stops working long before you do. Explore the Merryfair ergonomic seating range for chairs built around seat-pan engineering, depth-adjustable lumbar, and synchro-tilt mechanisms that hold the geometry sciatica needs.
The piriformis muscle sits directly above the sciatic nerve in roughly nine of ten people. Anything that compresses one compresses the other.
The first chair you set up correctly for sciatica is the one you stop noticing by hour five.
Frequently Asked Questions
How should I sit in a chair with sciatica nerve pain?
Sit with hips slightly above knees, feet flat on the floor, lower back against a lumbar pad at belt line, and backrest reclined between 100 and 110 degrees. Anchor the pelvis first by setting seat height and depth before adjusting lumbar. Shift your recline angle every 20 to 30 minutes rather than holding one position.
How to work at a desk with sciatica?
Calibrate the chair through the full Sciatica Adjustment Sequence before changing anything else. Position your monitor at eye level so you don’t tilt forward. Keep your keyboard and mouse close to avoid reaching, which pulls the pelvis out of position. Stand for two minutes every 30 minutes to offload the sciatic pathway entirely.
Is it better to sit on a hard or soft chair with sciatica?
Neither extreme. Soft chairs sink the pelvis backward and compress the sciatic nerve through soft tissue. Excess firmness concentrates load on the ischial tuberosities, irritating the nerve from below. Medium-firm seat pans with dynamic distribution (coil-spring bases, segmented foam, or high-tension mesh) outperform both static extremes for sciatic pressure.
How long should I sit in one position with sciatica?
No longer than 20 to 30 minutes in any single position, including a correctly calibrated one. The goal isn’t a single perfect posture; it’s frequent micro-movement between calibrated positions. Shift recline angle, stand briefly, or change your weight distribution. Static loading (even correct static loading) keeps the sciatic pathway under continuous pressure.
Can a wrong chair setup actually trigger sciatica?
A chair setup rarely triggers sciatica in someone with no predisposition. It commonly worsens existing irritation and prevents healing. Posterior pelvic tilt sustained for hours daily can also aggravate piriformis tension over months, which in a population with variant sciatic-nerve anatomy raises compression risk meaningfully.
What’s the fastest chair adjustment to try first?
Seat height. Raise the chair so your hips sit 1 to 2 centimetres above your knees and your feet stay flat (add a footrest if needed). This single change opens the hip-knee angle, reduces piriformis tension, and stops the posterior pelvic tilt that triggers most seated sciatica patterns. Most people feel a difference within an hour.
MORE BLOGS
Standard Desk Height: Is 29 Inches Right for Your Body?
Standard desk height is 29 to 30 inches (73 to 76 cm). That number fits far fewer people than you’d think. A desktop that tall matches the seated elbow height of someone around 6’2″. The average American man stands 5’9″, and the average woman 5’3.5″. So this guide does two jobs. It shows you how […]
Read More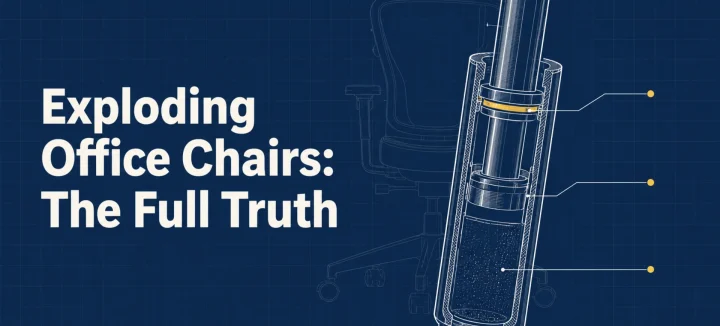
Exploding Office Chairs: The Full Truth From a Chair Maker
The exploding office chair story resurfaces every few years, same grainy photos attached. So can a chair really burst? A handful have, and every documented case involved an uncertified gas cylinder (the pressurized tube that raises and lowers your seat). Chairs built to recognized safety standards fail differently: seals leak, the seat sinks, nothing bursts. […]
Read More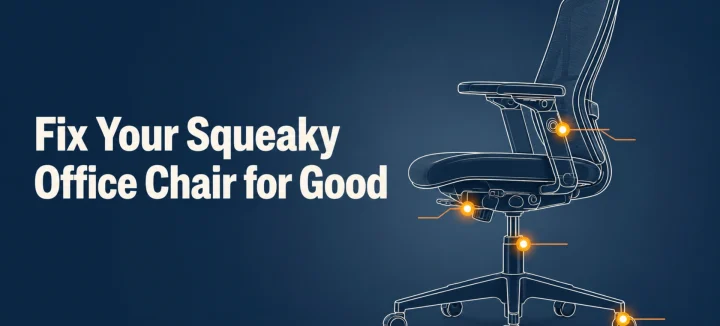
How to Fix a Squeaky Office Chair by Sound and Location
A squeaky office chair makes four different noises, and each one points to a different part. To silence it for good, find the source first: the tilt mechanism, gas cylinder, casters, or armrests. Then tighten what’s loose and lubricate with the right product for that joint. This guide matches each sound to its fix, and […]
Read More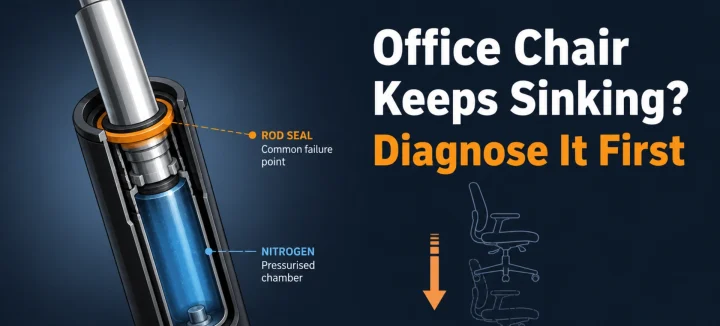
Office Chair Keeps Sinking? Diagnose and Fix It for Good
An office chair that keeps sinking or won’t stay up has one main cause: the gas cylinder under the seat is losing pressure. Worn seals let the nitrogen escape, so the piston stops holding your weight. A hose clamp or PVC pipe locks the height today; a new cylinder fixes it properly in 15 minutes. […]
Read More